

Cleaning & maintenance
Choose your product and read how to clean and maintain it. For the electric appliances, the full manual is available to download.
Electrical appliances
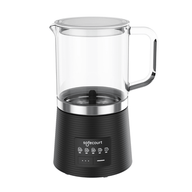
Milk frothers
For the Crystal and the Digital glass milk frother.
- For milk and alternatives only
- Do not immerse
- Earthed socket 220 to 240 V

The manual has all the programmes, settings, parts and what to do if something goes wrong.
The Digital glass milk frother comes in four colours, the Original and the Plus in two. Colour variants share the same manual.
- Milk Frother Crystal
- Digital glass milk frother
- Milk Frother Original
- Milk Frother Plus
- Milk Frother Digital
Care & cleaning
How to clean it
- The jug and whisk can go in the dishwasher.
- Wipe the motor base with a slightly damp cloth.
- Rinse the jug straight after use, and you’ll never have to scrub.
Rinse the jug right after use, and you’ll never have to scrub later.
Safety
Good to know
Only for milk, plant-based alternatives and hot chocolate.
Never immerse the motor base in water.
Don’t exceed the maximum fill line.
The other 9 safety instructions are in the manual above.
Frequently asked questions
Want to know more?
Can the milk frother go in the dishwasher?
The glass jug and the stainless steel jug are fully dishwasher safe. The motor base never goes in: wipe it with a dry or slightly damp cloth.
Can I froth oat milk in it?
Yes, the appliance is made for milk, plant-based milk alternatives and hot chocolate. The Digital also has a separate setting for plant-based milk.
Why does it overflow?
Then it’s too full. Don’t go over the maximum fill line, as overfilling can cause splashes, spills and burns.
What kind of socket does it need?
Only connect it to an earthed socket of 220 to 240 V ~ 50/60 Hz.
Electrical appliances
Slow juicers
For the PurePress and the PurePress Pro.
- Household use only
- Do not immerse
- No more than 20 minutes in one go

The manual has all the programmes, settings, parts and what to do if something goes wrong.
The PurePress comes in four colours and the PurePress Pro in two. Colour variants share the same manual.
Rinse the strainer straight after pressing, as dried-on pulp is much harder to remove later.
Safety
Good to know
For household use only, indoors and on a flat surface.
Never immerse the motor unit, cord or plug.
Unplug it before taking it apart.
The other 17 safety instructions are in the manual above.
Frequently asked questions
Want to know more?
How long can it run in one go?
No longer than 20 minutes in one go. Then let it rest for a while.
It’s jammed, what now?
Use the pusher or another piece of fruit or vegetable. If that doesn’t work, switch it off, unplug it and take it apart to unblock it.
What shouldn’t I clean it with?
Not with steel wool, abrasive cleaners or corrosive liquids such as petrol or acetone.
Electrical appliances
Blenders
For the PureBlend Blender, the Power Blender Onyx, the Glass Blender and the Glass Blender Digital.
- Indoors only
- No hot liquids
- Not above the MAX line

The manual has all the programmes, settings, parts and what to do if something goes wrong.
The PureBlend Blender comes in four colours; the colour variants share the same manual. The Glass Blender and the Glass Blender Digital each have their own manual.
Care & cleaning
How to clean it
- PureBlend Blender and Power Blender Onyx: the cups and lids are dishwasher safe.
- Glass Blender and Glass Blender Digital: rinse the glass jug, the lid, the measuring cup and the to-go cup by hand with warm water and a mild washing-up liquid, and dry everything straight away.
- Wash the blade unit by hand with a soft brush.
- Never immerse the motor base.
Straight after use, fill the jug with warm water and a drop of washing-up liquid, run the blender for a few seconds, then rinse it clean.
Safety
Good to know
Not to be used by children; keep the appliance and cord out of their reach.
Never immerse the motor base, cord or plug in liquid.
Don’t use it if the cord or plug is damaged or after it has been dropped.
You’ll find the other safety instructions in the manual for your model above.
Frequently asked questions
Want to know more?
Can I put hot soup in it?
Let hot liquids cool to below 40 °C first. Warm liquids give off steam, so keep your hands away from the lid opening.
Which parts can go in the dishwasher?
With the PureBlend Blender and the Power Blender Onyx, the cups and lids are dishwasher safe. With the Glass Blender and the Glass Blender Digital, rinse the glass jug, the lid and the to-go cup by hand. Always wash the blade unit by hand with a soft brush, and never immerse the motor base.
How full can the jug be?
Never above the MAX mark, and don’t use fizzy liquids, raising agents or yeast.
My Glass Blender suddenly stops. What now?
The overheating or overload protection has kicked in. Unplug the blender and let it cool down for 30 to 60 minutes. After that, run it for no more than 1.5 minutes at a time and let it rest for at least 5 minutes. If it still doesn’t work, please contact us.
Electrical appliances
Coffee grinders
For the Coffee Grinder Pro and the Coffee Grinder Deluxe.
- Indoors only
- Do not immerse
- Sharp knives

The manual has all the programmes, settings, parts and what to do if something goes wrong.
Now and then, grind a handful of uncooked rice to remove old oils from the burrs.
The full instructions for use and safety are in the manual. Only use the appliance indoors, never immerse the motor unit in water and unplug it before cleaning or taking it apart.
Frequently asked questions
Want to know more?
Can the grinder go in the dishwasher?
No. Wipe the burrs with a dry brush or cloth and never immerse the appliance in water.
Where can I find the full instructions?
In the manual, via the button above. It also lists the grind settings and maintenance intervals.
Electrical appliances
Air fry ovens
For the Poweroven 6-in-1 air fry oven and the Poweroven Pro.
- Indoors only
- At least 3 cm free all around
- 220 to 240 V ~ 50 Hz

The manual has all the programmes, settings, parts and what to do if something goes wrong.
The Poweroven comes in four colours. All colours share the same manual.
Never let the crumb tray fill up; it prevents odours and reduces the risk of fire.
Safety
Good to know
Indoors only, with at least 3 cm of free space all around.
The door and outside get hot; use oven gloves.
Let it cool completely and unplug it before cleaning it.
You’ll find the other safety instructions in the documentation that comes with your oven.
Frequently asked questions
Want to know more?
How much space does it need around it?
At least 3 cm free all around for air circulation, and away from curtains, walls and other appliances.
Can I use aluminium foil in it?
Don’t cover the crumb tray or other parts with aluminium foil. And never use it without the crumb tray correctly in place.
When can I clean it?
Only once it has cooled completely, and always unplugged.
Why isn’t the timer on my Poweroven Pro counting down yet?
On air fry, bake, broil, roast and pizza, the oven preheats first. The timer only starts after three beeps.
My Poweroven Pro beeps five times and shows E1, E2, E4 or E5. What now?
E1 and E2 indicate a fault in the temperature sensor, E4 and E5 a broken connection between the circuit boards. Unplug the oven, wait a minute and plug it back in. If the code comes back, please contact us.
Electrical appliances
Hand blenders
For the Hand Blender Set Original.
- Indoors only
- Do not immerse
- Sharp knives

The manual has all the programmes, settings, parts and what to do if something goes wrong.
Keep the shaft just below the surface while puréeing, and nothing splashes.
The full instructions for use and safety are in the manual. Only use the appliance indoors, never immerse the motor unit in water and unplug it before cleaning or taking it apart.
Frequently asked questions
Want to know more?
Can the shaft go in the dishwasher?
The detachable blending shaft and accessories usually can, but the motor unit never can. Check the manual via the button above.
How do I prevent splashes?
Keep the shaft just below the surface of what you’re puréeing and only switch it on once it’s in the bowl.
Electrical appliances
Hand mixers
For the Handmixer Easy.
- Indoors only
- Do not immerse
- Attachments dishwasher safe

Care & cleaning
How to clean it
- Always unplug the appliance first.
- Remove the attachments from the mixer. They can go in the dishwasher or in warm soapy water. Rinse them and dry them well.
- Wipe the mixer itself with a damp cloth and dry it with a soft cloth.
- Never put the motor housing in water. Make sure the mixer is dry before you plug it back in.
Always start on setting 1 and only then turn it up. That way, powder stays in the bowl and liquid doesn’t splash over the worktop.
The full instructions for use and safety are in the manual. Only use the appliance indoors, never immerse the motor unit in water and unplug it before cleaning or taking it apart.
Frequently asked questions
Want to know more?
Can the attachments go in the dishwasher?
Yes. The attachments can go in the dishwasher or in warm soapy water. Only wipe the mixer itself with a damp cloth.
Flour is getting into the mixer. Why is that?
The dough hooks are probably in the wrong openings. An attachment without a collar fits both openings, so check carefully which hook goes where.
How long can the mixer run without a break?
After three minutes of use, let it cool down for thirty seconds. Set the speed selector to 0 before you plug it in.
Electrical appliances
Contact grills
For the Ultra Compact 3-in-1 grill.
- Indoors only
- Hot surfaces
- Do not immerse
The manual has all the programmes, settings, parts and what to do if something goes wrong.
The Contact Grill Original and the Compact Grill both come in two colours. Colour variants share the same manual.
Care & cleaning
How to clean it
- The grill plates and drip tray unclip and can go in the dishwasher.
- Wipe the appliance itself with a slightly damp cloth.
- Unclip the plates once they’re warm to the touch.
Unclip the plates once they’re warm to the touch, not scorching hot and not completely cold.
The full instructions for use and safety are in the manual. Only use the appliance indoors, never immerse the motor unit in water and unplug it before cleaning or taking it apart.
Frequently asked questions
Want to know more?
Can the grill plates go in the dishwasher?
Yes. Simply unclip the grill plates and drip tray, and all the removable parts can go straight in the dishwasher.
Can the appliance itself go under the tap?
No. Never immerse the appliance with the heating element; wipe it with a slightly damp cloth.
Pans and utensils
Ceramic pans
Naturally non-stick, so no coating that needs seasoning. It is sensitive to metal and high heat, though.
- Low to medium heat
- Naturally non-stick
- Hand wash recommended

Care & cleaning
How to clean it
- The dishwasher isn’t recommended, to protect the coating in the long run. Cleaning is still a breeze.
- Let the pan cool completely first. Then clean it with warm water and a soft sponge.
- Don’t use metal utensils in your pan.
Something still sticking? Let soapy water simmer on a low heat, then gently scrape it away.
Care
Before cooking
-
Quick wash
Before first use, wash your pans by hand in warm soapy water to remove dirt and residue from the production and shipping process.
-
Dry well
Dry them with a soft, non-abrasive tea towel to prevent scratches. The bottom of the pan must be dry before you put it on the hob.
-
No seasoning needed
Ceramic is naturally non-stick; no seasoning needed, a dash of oil is enough.
-
Ready for the heat
Preheat the pan for no more than 90 seconds on a low to medium heat only, before adding oil. Don’t leave an empty pan on a hot hob, except on a very low heat.
Care
While cooking
-
Heat under control
Ceramic retains heat more efficiently than traditional pans, so use the pans on a low to medium heat. Overheating can damage the non-stick coating.
-
Less is more
Food glides effortlessly across ceramic pans, so go easy on oil or butter. 1-2 tablespoons is plenty to lightly grease the whole pan surface. Let the pan preheat for 20-30 seconds before adding food.
-
No sprays
Don’t use oil sprays or aerosols to grease the pans; that way you keep the naturally smooth surface.
-
No sharp edges
Metal utensils with rough edges can damage the non-stick coating. Use wood, silicone, plastic or nylon. Always cut or chop food on a separate surface, not in the pan.
-
Soft landing
Put the pans down and lift them up carefully. Don’t slide them across a metal hob; this can damage the steel base.
-
Handle carefully
Always handle hot pans with a pot holder, oven glove or tea towel. Put them on a trivet when placing them on a worktop.
-
Hold the lid from above
Hold the lid handle with your fingertips or with your palm facing down, so your hand doesn’t touch a hot lid.
-
Lift the lid
Lift the lid at a slight angle above the pan, so the collected moisture runs back into the pan.
-
Thumb rest
The ergonomically shaped stainless steel handles have a small raised part on the underside that shows how far you can hold the handle without it feeling too hot while cooking. For safety, always handle hot pans with a pot holder, oven glove or tea towel.
Care
After cooking
-
Let it cool
Let your cookware cool completely before running cold water over it, to prevent thermal shock (which can make the pan crack). The pans can handle both very high and very low temperatures, but sudden, large temperature changes can shorten their life.
-
No dishwasher needed
Our non-stick coating makes cleaning a piece of cake. Save time and water with a gentle scrub to keep your pans in optimal condition.
-
Spotless
Clean the cooking surface with warm soapy water and a non-abrasive sponge or cloth until the pan is spotless before storing it. For stains on the outside, you can use a tougher sponge (we recommend a steel wool pad) with a strong cleaning product.
-
Stuck-on food
If food sticks to the surface, let soapy water simmer on a low heat, then gently scrape it away with a sponge or non-scratch scourer. Repeat if needed.
Frequently asked questions
Want to know more?
Do I need to season the ceramic coating?
No. Ceramic is naturally non-stick, so no seasoning is needed. A dash of oil is enough.
Can I use metal utensils?
No. Metal utensils with rough edges can damage the non-stick coating. Use wood, silicone, plastic or nylon, and always cut food on a separate surface.
Why can’t I use baking spray?
Oil sprays and aerosols damage the naturally smooth surface. Use butter or liquid oil instead.
What is the raised part on the handle for?
That’s the thumb rest. The raised part shows how far you can hold the handle without it feeling too hot while cooking. Always use a pot holder to be safe.
Pans and utensils
Hybrid pans
Stainless steel with a non-stick coating. That’s why metal utensils are fine, but keep the heat low.
- Low to medium heat
- All hobs, including induction
- Oven-safe up to 230 °C
Discolouration of the steel is normal. Ten minutes soaking in warm soapy water and it’s gone.
Care
Before cooking
-
Quick wash
Before first use, wash your pans by hand in warm soapy water to remove dirt and residue from the production and shipping process.
-
Dry well
Dry them with a soft, non-abrasive tea towel to prevent scratches. The bottom of the pan must be dry before you put it on the hob.
-
No seasoning needed
The non-stick coating doesn’t need seasoning; a dash of oil is enough.
-
Ready for the heat
Preheat the pan for no more than 90 seconds on a low to medium heat only, before adding oil. Don’t leave an empty pan on a hot hob, except on a very low heat. Suitable for induction and all other hobs.
Care
While cooking
-
Heat under control
Use the pans on a low to medium heat. Overheating can damage the non-stick coating.
-
Less is more
Food glides effortlessly across the pan, so go easy on oil or butter. 1-2 tablespoons is enough to lightly grease the whole surface. Let the pan preheat for 20-30 seconds before adding food.
-
No sprays
Don’t use oil sprays or aerosols, to protect the non-stick coating.
-
Metal-utensil safe
These hybrid pans are safe for metal utensils, as well as wood, silicone, plastic or nylon.
-
Soft landing
Put the pans down and lift them up carefully. Don’t slide them across a metal hob; this can damage the steel base.
-
Oven-safe
Oven-safe up to 230 °C. Use a pot holder, oven glove or tea towel for the handle and pan after use in the oven or under the grill.
-
Cool-touch handles
The handles stay cool during normal use on the hob. Always handle the hot pan itself with a pot holder, oven glove or tea towel, and put pans on a trivet on a worktop.
-
Hold the lid from above
Hold the lid handle with your fingertips or with your palm facing down, so your hand doesn’t touch a hot lid.
-
Lift the lid
Lift the lid at a slight angle above the pan, so the collected moisture runs back into the pan.
Care
After cooking
-
Let it cool
Let your cookware cool before running cold water over it. Sudden temperature changes can warp the pan or damage the coating.
-
Dishwasher safe
These pans are dishwasher safe. Washing them by hand also keeps them in optimal condition.
-
Spotless
Clean the cooking surface with warm soapy water and a non-abrasive sponge or cloth until the pan is spotless before storing it. For stains on the outside, you can use a tougher sponge (we recommend a steel wool pad) with a strong cleaning product.
-
Temporary discolouration
Because these hybrid pans contain stainless steel, temporary discolouration can occur. For stubborn stains, soak the pan for 10-15 minutes in warm soapy water, then scrub it with a sponge.
-
Stuck-on food
If food sticks to the surface, let soapy water simmer on a low heat, then gently scrape it away with a sponge or non-scratch scourer. Repeat if needed.
Frequently asked questions
Want to know more?
Can the hybrid pans go in the dishwasher?
Yes, they’re dishwasher safe. Washing them by hand does keep them in the best condition.
Can I use metal utensils?
Yes. These hybrid pans are safe for metal utensils, and also for wood, silicone, plastic and nylon.
Up to what temperature can the pan go in the oven?
Up to 230 °C. After use in the oven or under the grill, always use a pot holder, oven glove or tea towel for the handle.
My pan is discoloured, is that a problem?
No. Because it contains stainless steel, temporary discolouration can occur. Soak the pan for 10 to 15 minutes in warm soapy water, then scrub it with a sponge.
Does the pan work on induction?
Yes, it’s suitable for induction and all other hobs.
Pans and utensils
Stainless steel pans
Five layers of stainless steel that hold heat for a long time. That’s why you cook on a lower heat than you’re used to.
- Low to medium heat
- 5-ply stainless steel
- Hand wash recommended

Food should sizzle as soon as it hits the pan. If it doesn’t, the pan wasn’t hot enough yet.
Care
Before cooking
-
Quick rinse
Wash your pans by hand with warm water and washing-up liquid to remove dirt or residue from the production and transport process.
-
Spick and span
Dry with a soft, non-abrasive tea towel to prevent scratches and drying marks. The base of your pan must be dry before it touches a hob.
-
Ready to go
Add oil or butter to your pan for a smooth layer under your food. Let ingredients come to room temperature before putting them in the hot pan (food that’s too cold sticks to a hot pan more easily!).
-
Ready for the heat
Preheat on a low to medium heat before adding oil. Don’t leave an empty pan on a hot hob.
-
Find your perfect recipe
Keep an eye on your heat setting the first few times to gauge how efficient your hob and oven are, and adjust recipes if needed. Food should sizzle as soon as it hits the pan, a sign that the pan is properly heated.
Care
While cooking
-
Keep it low
Safecourt’s 5-ply stainless steel cookware retains heat more efficiently than traditional pans, so cook on a low to medium heat. Overheating can make food stick to the pan.
-
All natural
Add oil or butter to your pan to lightly coat the whole surface. Let the pan preheat before adding food.
-
No sprays
Avoid oil sprays or baking spray. Use butter or liquid oil instead to look after your cookware.
-
Salt when hot
Wait to add salt until the food in the pan is properly hot, to prevent limescale and pitting on the surface of your cookware.
-
No sharp edges
Utensils with rough edges (such as metal knives, whisks or spatulas) damage your stainless steel pans; so use soft materials such as wood, silicone, plastic or nylon.
-
Put down gently
Place pans on and off the hob carefully. Sliding them over metal hobs scratches the outside of the pan.
Care
After use
-
Let it cool first
Let your cookware cool completely before running cold water over it, to prevent thermal shock (and possible cracks).
-
No dishwasher needed
Save time and water with a gentle scrub to keep your pans in top condition. Avoid the dishwasher, as it can shorten the life of your cookware.
-
Squeaky clean
Clean the cooking surface with warm water, washing-up liquid and a non-abrasive sponge or cloth until the pan is spotless, before storing it. For stubborn stains, you can use a tougher sponge with a stronger cleaning product.
Frequently asked questions
Want to know more?
Can the stainless steel pan set go in the dishwasher?
Better not. The dishwasher can shorten the life of your cookware. A gentle scrub by hand keeps the pans in top condition.
Why does my food stick to the pan?
Usually because the heat is too high or the food too cold. Cook on a low to medium heat and let ingredients come to room temperature before they go in the hot pan.
When do I add the salt?
Only once the food in the pan is properly hot. Salt added too early causes limescale and pitting on the surface.
What does 5-ply mean?
The cookware consists of five layers that retain heat more efficiently than traditional pans. That means you can cook on a lower setting.
Pans and utensils
Kitchen accessories
Wooden spatulas, cutting boards and knife blocks. Wood likes to be washed by hand and oiled now and then.
- Hand wash only
- Pre-treated wood
- Oil boards monthly

Always stand wood upright to dry, never flat. That way it dries evenly and doesn’t warp.
Care
Before first use
-
Quick rinse
Wash all knives and utensils by hand in warm soapy water to remove dirt or residue from the production and shipping process.
-
Clean and fresh
Wipe the inside of the tray and the holder with a damp cloth before putting them on your worktop.
-
Spotless
After washing, dry all parts with a soft, non-abrasive tea towel to prevent scratches.
-
No treatment needed
Your wooden utensils, knife block and utensil holder are pre-treated; you don’t need to oil or wax them before or after use.
Care
Caring for your utensils
-
Hand wash only
Always wash your utensils by hand in warm soapy water straight after use. Wash both sides to prevent uneven drying. Don’t immerse your utensils in water or soapy water, so they don’t warp.
-
Stand upright
Warping and cracking can happen because wood expands and shrinks. Stand your utensils upright on your worktop to dry, or wipe them with a tea towel to remove excess water before putting them away.
-
The big clean
To disinfect, sprinkle coarse salt on the spot, squeeze lemon juice over it and rub the mixture over the spot with the lemon. Let the paste dry and gently wipe it away. You can also use a solution of 25% white cleaning vinegar and 75% water. Don’t use bleach or bicarbonate of soda on your utensils, as this can cause damage.
Care
How to care for your cutting boards
-
Hand wash only
Always wash both sides of your boards by hand in warm soapy water. Don’t immerse them in water or put them in the dishwasher. If you’re cutting something that doesn’t need rinsing off, avoid water to extend the life of your boards.
-
Stand upright
Warping and cracking can happen because wood shrinks and expands. Always stand your boards upright on the worktop or in the holder to dry, so they dry evenly.
-
Handle with care
For a longer life, apply food-safe mineral oil once a month with a clean cloth. Leave the oil to soak in overnight, then wipe dry. For extra shine, apply food-safe beeswax once the board is dry. Don’t use vegetable or nut oils on your boards.
-
Sparkling clean
To disinfect stains, squeeze fresh lemon juice directly onto your boards with a pinch of coarse salt, and rub the mixture over the whole surface with the lemon. Once dry, gently scrape it off. Or use a solution of 25% distilled white vinegar and 75% water. Don’t use bleach or bicarbonate of soda on your boards.
Pans and utensils
Food storage & airtight containers
Glass containers and airtight containers. They can go from the fridge to the oven, just not in one go.
- Microwave and oven up to 230 °C
- Fridge and freezer
- Not under the grill

Care
Before first use
-
Quick rinse
Wash all containers by hand with warm water and washing-up liquid to remove dirt or residue from the production and transport process.
-
Spotless
Dry with a soft, non-abrasive tea towel to prevent scratches.
-
No open flames
Your glass containers can’t handle open flames; only use the microwave or oven.
Care
During use
-
No sharp cutlery
Metal cutlery can scratch the glass; use soft wooden, silicone, plastic or nylon utensils.
-
Put down gently
Sliding it over surfaces can scratch the glass. Always lift the container carefully and put it down gently; don’t drop it.
-
Too hot to hold
Always use a pot holder, oven glove or tea towel when taking it out of a hot oven or microwave.
-
Hot container
After the oven or microwave, always put a hot container on a trivet, pot holder or tea towel to protect your worktop.
-
Defrost first
Don’t put containers straight from the freezer into a hot oven or microwave. Let frozen food defrost before reheating it.
-
Leave some space
When using it in the freezer or fridge, leave space in the container so liquid or food can expand.
-
Let it cool
Let warm food cool completely before closing the container and storing it.
Care
Microwave and oven
-
Easy reheating
Follow your microwave’s instructions for power and time when defrosting, cooking or reheating. Prolonged overheating damages the containers.
-
Lid off
Always remove the lid when using the microwave.
-
Don’t heat it empty
Never heat an empty container in the microwave.
-
No cling film
Don’t use cling film on or in the container in the microwave. Film can heat up, melt and stick to the side.
-
Ready for the oven
Only the glass containers can go in the oven, up to 230 °C; remove all lids and inserts before they go in.
-
Preheat the oven
Preheat the oven to the desired temperature before putting the containers in. Don’t put empty glass containers in the oven.
-
Find your ideal setting
Keep a close eye on the temperature or oven time the first few times and adjust recipes where needed.
-
Not under the grill
Not suitable for the oven’s grill setting.
Care
After use
-
Let it cool
After the microwave or oven, let the containers cool completely before putting the lid on or running cold water over them, to prevent melting or thermal shock and therefore cracks.
-
Cleaning
Wash containers and lids by hand with warm water, washing-up liquid and a non-abrasive sponge.
-
Stubborn stains
For stubborn stains, use a soft sponge cloth, or put the containers in the dishwasher on a normal programme.
-
Dry properly
Dry thoroughly with a soft, non-abrasive cloth. Store the containers with the lid off, so all parts dry completely.
-
Storage
When stacking, put a protective cloth between the containers to prevent direct contact and scratches.
Frequently asked questions
Want to know more?
Can the containers go in the microwave?
Yes, but always without the lid and never empty. And don’t use cling film on or in the container, as film can melt and stick.
Can they go in the oven?
Only the glass containers, up to 230 °C, and without lids or inserts. Not suitable for the grill setting.
Can I put a container straight from the freezer into the oven?
No. Let frozen food defrost first. A sudden change in temperature causes thermal shock and can crack the glass.
Can they go in the dishwasher?
Washing by hand is recommended. For stubborn stains, the containers can go in the dishwasher on a normal programme.
Why should I leave space in the container?
In the freezer and fridge, liquid or food expands. Leaving some space in the container prevents pressure on the glass and the lid.
Pans and utensils
Bakeware
Ceramic-coated and made for the oven. It doesn’t belong on the hob or under the grill.
- Oven only
- Not above 300 °C
- Not under the grill
Baked on? Two tablespoons of bicarbonate of soda and a cup of vinegar, leave for thirty minutes.
Care
Before baking
-
Quick wash
Wash your bakeware by hand with warm water and washing-up liquid to remove dirt or residue from the production and shipping process.
-
Sparkling clean
Dry with a soft, non-abrasive tea towel to prevent scratches. The entire top and bottom of your bakeware must be completely dry before you put it in the oven.
-
No seasoning needed
Ceramic is naturally non-stick, so you don’t need to season your bakeware.
-
Ready for the heat
Preheat your oven to the desired temperature before putting your bakeware in. Don’t put empty bakeware in the oven without food in it.
-
No open flames
Your bakeware can’t handle open flames (hobs, grills, campfires), so only use it in the oven.
Care
While baking
-
Find your winning recipe
The ceramic coating on our bakeware ensures even heat distribution. Keep a close eye on your heat setting the first few times to find the perfect baking temperature or time, and adjust recipes as needed.
-
Well prepared
Food releases easily from our ceramic coating if you dust it fully with flour beforehand or grease it lightly with oil or butter, following the recipe instructions. For quick cleaning, baking paper also preserves the non-stick effect.
-
No sprays
Avoid oil sprays or baking aerosols. Use butter or liquid oils instead to preserve the smooth coating as well as possible.
-
No sharp edges
Utensils with rough edges damage your non-stick coating, so only use soft tools made of wood, silicone, plastic or nylon. Avoid metal completely. Don’t cut baked goods in the tin.
-
Place carefully
Sharp metal edges can damage the outer coating, so place the bakeware carefully on and off oven racks and hobs.
-
Too hot to handle
Use a pot holder, oven glove or tea towel when putting your bakeware in or taking it out of the oven, as the tins and handles get hot.
-
Hot and crackling
It’s normal for bakeware to warp slightly in the oven and make a popping sound because of the heat. Don’t worry: the reinforced rim makes sure it goes flat again once it has cooled.
-
Bake, never grill
Not for use under the oven grill, above 300 °C, or in the microwave.
-
After the oven
After taking your bakeware out of the oven, put it on a trivet or wooden board to protect your worktop.
Care
After baking
-
Let it cool
Let your bakeware cool completely before running cold water over it, to prevent thermal shock that can make it crack. Your bakeware can handle extreme temperatures at both ends of the scale, but sudden, large swings shorten its life.
-
Easy cleaning
Thanks to our non-stick coating, everything is easy to clean by hand. Save time and water with a gentle scrub to keep your bakeware in optimal condition.
-
Deep clean
Clean the dish with warm water, washing-up liquid and a non-abrasive sponge or cloth until it’s spotless before you put it away. Don’t use scouring pads or harsh cleaning products, not even on the outside.
-
Baked-on food
Food stuck? Cover the tin with 2 tablespoons of bicarbonate of soda and 1 cup of vinegar. Leave the mixture for 30 minutes. This loosens baked-on food so you can wipe it away easily. Then wash the tin with mild washing-up liquid.
-
Discolouration
Just like with your favourite cast-iron pan, discolouration is natural and unavoidable with regular baking and use. Bicarbonate of soda and vinegar fix it effortlessly.
-
Dry properly
Dry with a soft, non-abrasive tea towel or let it air-dry completely.
-
Storage
Make sure your bakeware is completely dry before you put it away. When stacking, place a tea towel between the dishes to prevent scratches.
Frequently asked questions
Want to know more?
Can bakeware go on the hob?
No, only in the oven. Open flames, hobs, grills and campfires aren’t suitable.
Up to what temperature is it safe?
Up to 300 °C. Not under the oven grill and not in the microwave.
My baking tin makes a popping sound, is that normal?
Yes, that’s normal. Bakeware warps slightly in the oven because of the heat and goes flat again once it has cooled, thanks to the reinforced rim.
How do I get baked-on food off?
Cover the tin with 2 tablespoons of bicarbonate of soda and 1 cup of vinegar and leave it for 30 minutes. Then simply wipe it away and wash the tin with mild washing-up liquid.
My baking tin is discoloured, can I fix that?
Discolouration is natural with regular baking, just like with a cast-iron pan. Bicarbonate of soda and vinegar fix it effortlessly.
Pans and utensils
Mixing bowls
Stainless steel with a silicone base and a glass lid. Made for mixing and storing, not for heat.
- Not in the oven or microwave
- Fridge and freezer
- Dishwasher safe
The bowls stack inside each other, so you never lose one in the cupboard.
Care
Before first use
-
Quick rinse
Wash the bowl and lid by hand with warm water and washing-up liquid to remove dirt or residue from the production and transport process.
-
No open flames
Don’t use the bowl or lid on a hob, in the oven or near an open flame.
Care
During use
-
Mixer-friendly
Suitable for electric hand mixers and everyday prep; avoid cutting or scraping with sharp knives, as this can damage the mirror-smooth inside.
-
Firm grip
The silicone base keeps the bowl steady; don’t use the bowl or the base as a cutting surface.
-
Mind the lid
The glass lid has a fixed steam vent. Hold it by the rim and avoid knocks or drops to prevent breakage.
-
Defrost first
Suitable for storing in the fridge and freezer; don’t move directly from the freezer to a heat source.
-
Leave some space
When freezing, leave space in the bowl so liquid or food can expand.
-
Let it cool
Let warm food cool before closing the bowl with the lid and storing it.
Care
Heat and temperature
-
Not in the microwave
The stainless steel bowl is not microwave safe.
-
Not in the oven
Don’t use the bowl or the glass lid in the oven, under the grill or on a direct heat source.
-
Be careful with hot contents
Stainless steel conducts heat; use a cloth or pot holder when the bowl holds hot contents.
Care
After use
-
Dishwasher safe
The bowl and lid are dishwasher safe on a normal programme.
-
Wash by hand
For quick cleaning: wash with warm water, washing-up liquid and a non-abrasive sponge.
-
Dry properly
Dry thoroughly with a soft cloth to prevent water marks and preserve the finish.
-
Easy storage
The bowls are designed to stack inside each other for compact storage.
Frequently asked questions
Want to know more?
Can the bowl go in the microwave or oven?
No. The stainless steel bowl isn’t microwave safe, and neither the bowl nor the glass lid can go in the oven, under the grill or on a direct heat source.
Can I use a hand mixer in it?
Yes, the bowls are suitable for electric hand mixers and everyday prep. Avoid cutting or scraping with sharp knives, as that damages the mirror-smooth inside.
Can they go in the fridge and freezer?
Yes. When freezing, leave some space so the contents can expand, and don’t move the bowl directly from the freezer to a heat source.
Can the bowl and lid go in the dishwasher?
Yes, both on a normal programme. Then dry thoroughly with a soft cloth to prevent water marks.
Pans and utensils
Filter Basket
One part, one rule: keep it away from heat and dry it well.
- Not on an open flame
- Dishwasher safe
Care
Use and care
-
Rinse first
Before first use, wash with warm water and washing-up liquid.
-
No open flames
Don’t use on a hob, in the oven or near an open flame.
-
Dishwasher safe
Dishwasher safe, or wash with a non-abrasive sponge.
-
Dry properly
Dry thoroughly to prevent water marks.
Frequently asked questions
Want to know more?
Can the filter basket go in the dishwasher?
Yes, it’s dishwasher safe. Washing by hand with a non-abrasive sponge is fine too.
Can it go on the hob?
No. Don’t use it on a hob, in the oven or near an open flame.
Where do those water marks come from?
From not drying it completely. Dry the filter basket thoroughly straight after washing, and stains stay away.
Pans and utensils
Coffee cups
Ceramic with a reactive glaze. They can go in the dishwasher and the microwave.
- Dishwasher safe
- Microwave safe
- PFAS-free

Care & cleaning
How to clean it
- The cups are dishwasher safe.
- You can also warm up your drink in the microwave.
- Don’t use abrasive cleaning products or steel wool, so the glaze stays beautiful.
Avoid big changes in temperature, such as putting a hot cup straight under the cold tap. That’s not good for ceramic.
Frequently asked questions
Want to know more?
How much does a cup hold?
230 ml per cup: enough for a coffee, cappuccino or cup of tea.
Is there PFAS in the glaze?
No. The cups are completely PFAS-free.
How do I get coffee stains out?
Let the cup soak for a while in warm water with a mild washing-up liquid and then rinse it clean, or put it in the dishwasher.
Repair & spare parts
Something broken or lost a part? It happens.
We build our products to last and would rather replace a part than the whole appliance. That’s better for you and for the planet. You get a standard warranty, and after that we’re still here to help.
Please note: the warranty terms aren’t in the manual. You’ll find them on our warranty page.